Hey everybody! What we’re going to cover in this video is one of the new features in iZotope Ozone 7, the Codec Preview.
Codec Preview allows you to hear, in real-time, what lossy audio compression will sound like on your master. It comes in two flavors, mp3, which needs no introduction, and AAC, which is what iTunes uses.
Codec Preview is included only with the Advanced version of Ozone 7, and is one of the reasons you may want to consider upgrading from the standard version.
How It Works
For this preview I’m going to load up my title track from my recent EP, In the Wild. This track has already been mastered in Ozone 5, and with the Codec preview we will be able to hear the song before I compress it.
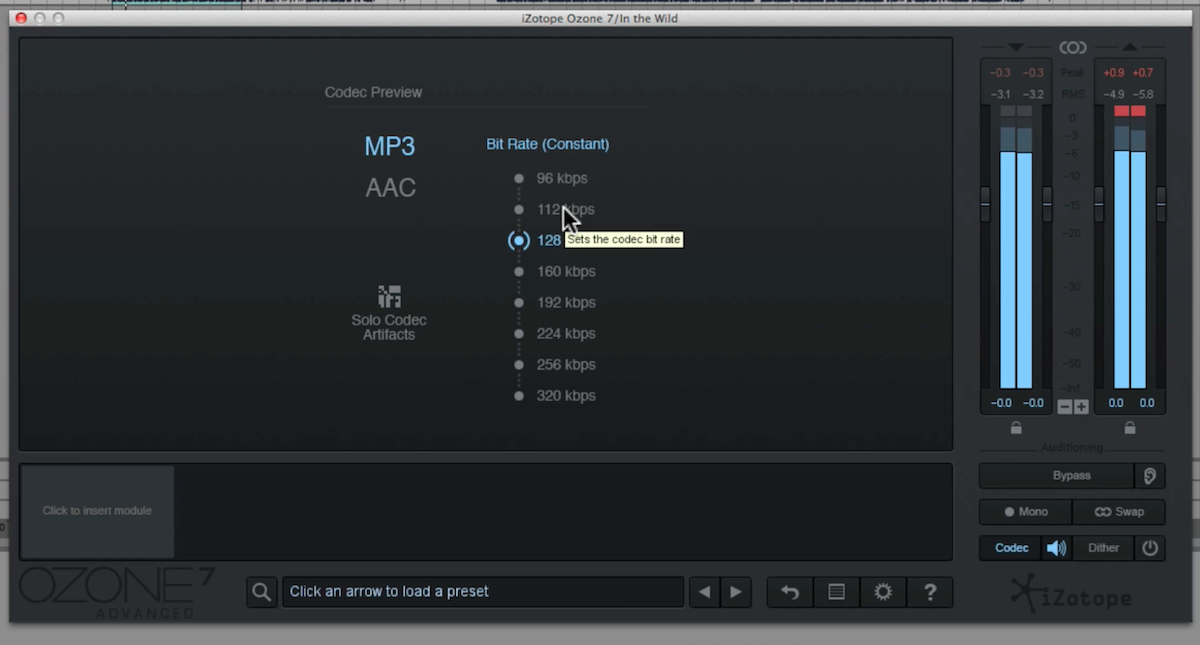
In the bottom right hand corner you click on Codec and toggle the speaker button to hear the preview. Now we can toggle between MP3 and AAC, and choose a bit rate from 320kbps down to 96 kbps.
As we decrease the bit rate is the quality of the result goes down substantially which we would normally expect from compression. Note the level meters on the right hand side. When I lower the bit rate, we start to get clipping. When you are compressing to a lossy format you are going to get rounding errors that are going to introduce noise. This noise increases as you decrease in bit rate.
If you are mastering for a lossy format like AAC or mp3, you’re going to want to leave yourself more headroom. When I’m mastering for iTunes, Soundcloud or Youtube I’ll typically leave anywhere from 1-3 db of margin on the limiter. One thing you will notice is that AAC is a superior form of encoding and will introduce less artifacts then mp3. iZotope has an awesome tutorial on Mastering for Compressed Audio Formats that you can check out here.
- Pro-tip: Soundcloud uses MP3 128 kbps for streaming, so you can use these settings to preview what your track will sound like.
Another cool feature is that you can solo the Codec Artifacts so you can hear exactly what is being removed. This is a huge workflow improvement, because now you can do all of your work right inside your DAW with Ozone and speed up your workflow.
This processing does take up a lot of CPU, so I recommend increasing your buffer size before doing this. Also make sure that the Codec Preview is the very last thing in your signal chain. Also make sure that the Codec Preview is the very last thing in your signal chain. And finally, this may be an obvious face-palm moment, but make sure to turn the Codec preview off before you do your final exports, as you don’t want to have a second round of compression occurring. It’s been done before so make sure to turn it off before doing your final renders.
If you want to check out the new Ozone 7 more, our lead trainer Jake Perrine has a series of tutorials you should check out! There are 4 total videos covering the following topics:
- Using the New Ozone 7 Advanced Vintage EQ
- How to Use the Ozone 7 Advanced Vintage Compressor
- Tape Saturation with Ozone 7 Vintage Tape Device
- Using the Ozone 7 Vintage Limiter
You can also try a full free trial version of Ozone 7 for 10 days, check it out here: https://goo.gl/y21sTF